When I started this post I had the preconceived notion that
automatically posting from Blogger to Facebook would not be an issue at
all. For some reason in the back of my mind this was as simple as using
email notification to the Facebook email-to-post feature, or using Google's Feedburner.
Well, I was quite wrong about this. Trying to use the email-to-post feature in Facebook only added the blog name and title to my Facebook wall with no content or links. From Feedburner, it looked like Facebook might work but they're only supporting Twitter in their socialize feature.
Now, there are a number of Facebook plug-ins such as RSS Graffiti you can use to grab your blogger RSS feed and post it to your wall. However, I found another tool so useful that I think this might be the easiest path for anyone to use.
I won't lead you on how to setup an account - you'll just need a user name and password - that's very easy to do. As you start you'll just need to activate and register your Blogger account and select your desired blog like this:
And then tie your Blogger blog to the IFTTT account:
Once registered your first step is to 'Create a Recipe' - and in our case it is going to be from Blogger to Facebook:
Simply click on the blue 'this' text to select Blogger as you source choice:
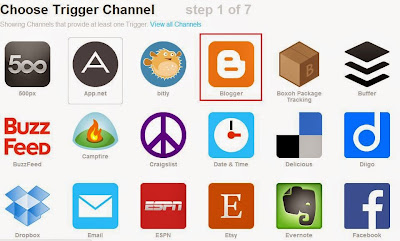
You can see that there are many options for source - I've highligted the Blogger button. Next, just 'Choose a Trigger' type. In this case we want new Posts to be published to Facebook. However, you might want the second label option:
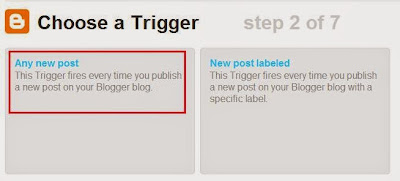
Go ahead and select 'Any new post' for now. Now you will see the Trigger that will kick off the event.
Just select the 'Create Trigger' button to continue. You're going to be directed now to the action that occurs when you trigger off a Blogger Post. Just select the 'that' blue link to continue:
Now you'll see the full list again of social media sites. There are some great options here - but, for our tutorial just click on the 'Facebook' icon:
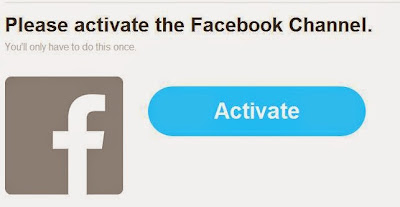
If this is your first time into IFTTT then you'll need to register your Facebook account much like how you did your Blogger account. Be sure you're logged into your desired Facebook account first.
Now you'll have to make a selection if you want the Blogger post to be fully copied to Facebook, or, just a link back to the blog. I prefer the second option 'Create a link post' - but you make your choice:
This is the tricky part - how you want the message formatted on your Facebook page. You can certainly experiment with this - but, you'll want to Create an Action that has the URL in the link field and the subject with your own text mixed with your blog post:
Just press 'Create Action' when done and you should have something like this:
You can see I used the PostContent field - but, you certainly don't have to fill your wall with the full Blogger post. Your connection is now ready!!
Now that your link is active you can test it by posting to Blogger, then jumping over to IFTTT.com and clicking on the Recipe you just created and selecting the 'Check' button on the right side of the screen like so:
This normally runs every 15 minutes - but, by clicking on Check your post will appear on Facebook in seconds.
A Great tool in my mind! Enjoy!! - Pelumi JP
Well, I was quite wrong about this. Trying to use the email-to-post feature in Facebook only added the blog name and title to my Facebook wall with no content or links. From Feedburner, it looked like Facebook might work but they're only supporting Twitter in their socialize feature.
Now, there are a number of Facebook plug-ins such as RSS Graffiti you can use to grab your blogger RSS feed and post it to your wall. However, I found another tool so useful that I think this might be the easiest path for anyone to use.
If This then That - or, If Blogger then Facebook
A new online utility has appeared that can simply move your social postings around between sites called IFTTT.com (or, in other words, If This, Then That). It is so incredibly intuitive and easy to use that I had no issues setting it up.I won't lead you on how to setup an account - you'll just need a user name and password - that's very easy to do. As you start you'll just need to activate and register your Blogger account and select your desired blog like this:
And then tie your Blogger blog to the IFTTT account:
Once registered your first step is to 'Create a Recipe' - and in our case it is going to be from Blogger to Facebook:
Simply click on the blue 'this' text to select Blogger as you source choice:
You can see that there are many options for source - I've highligted the Blogger button. Next, just 'Choose a Trigger' type. In this case we want new Posts to be published to Facebook. However, you might want the second label option:
Go ahead and select 'Any new post' for now. Now you will see the Trigger that will kick off the event.
Just select the 'Create Trigger' button to continue. You're going to be directed now to the action that occurs when you trigger off a Blogger Post. Just select the 'that' blue link to continue:
Now you'll see the full list again of social media sites. There are some great options here - but, for our tutorial just click on the 'Facebook' icon:
If this is your first time into IFTTT then you'll need to register your Facebook account much like how you did your Blogger account. Be sure you're logged into your desired Facebook account first.
Now you'll have to make a selection if you want the Blogger post to be fully copied to Facebook, or, just a link back to the blog. I prefer the second option 'Create a link post' - but you make your choice:
This is the tricky part - how you want the message formatted on your Facebook page. You can certainly experiment with this - but, you'll want to Create an Action that has the URL in the link field and the subject with your own text mixed with your blog post:
Just press 'Create Action' when done and you should have something like this:
You can see I used the PostContent field - but, you certainly don't have to fill your wall with the full Blogger post. Your connection is now ready!!
Now that your link is active you can test it by posting to Blogger, then jumping over to IFTTT.com and clicking on the Recipe you just created and selecting the 'Check' button on the right side of the screen like so:
This normally runs every 15 minutes - but, by clicking on Check your post will appear on Facebook in seconds.
A Great tool in my mind! Enjoy!! - Pelumi JP
Follow us for more Updates Twitter


0 comments:
Post a Comment